You can freeze fresh yeast, and that’s a great option if you can’t use the whole fresh yeast block before it dries out or goes bad.
Fresh yeast lasts only a couple of weeks, and if you can’t use it within that period, freezing is probably the only option to save it.
The process is pretty simple, but there are a few things worth knowing, especially about defrosting the yeast.
Here’s what you’re going to learn in this article:
- how freezing affects fresh (or cake) yeast
- how to freeze cake yeast
- ways to successfully defrost it (and if you should discard it if it turns out gooey)
- using defrosted fresh yeast
Interested? Read on.

Can You Freeze Fresh Yeast?
You can freeze fresh yeast for at least three months without much change in quality.
To successfully freeze it, make sure the yeast is wrapped tightly so that it doesn’t dry out in the freezer. That’s because if it’s dry, it’s useless, and the same is true for fresh yeast that sits in your fridge.
Now, I read in a couple of places that freezing destroys the yeast and renders the product useless after defrosting. Fortunately, that’s not the case.
Sure, some fungi might not survive the freezing process, but that number is probably less than 10 percent. I don’t have any hard evidence for that claim, but the cake dough you make using defrosted yeast still rises just fine.
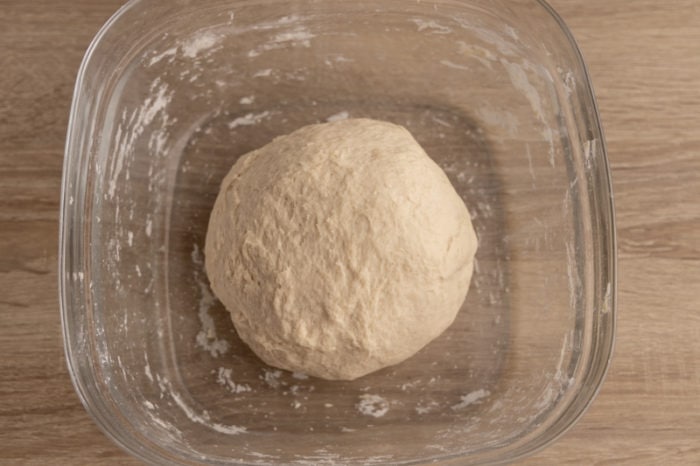
Let me show you what I mean.
Here’s my cake dough before rising:
And here’s the same dough after rising:
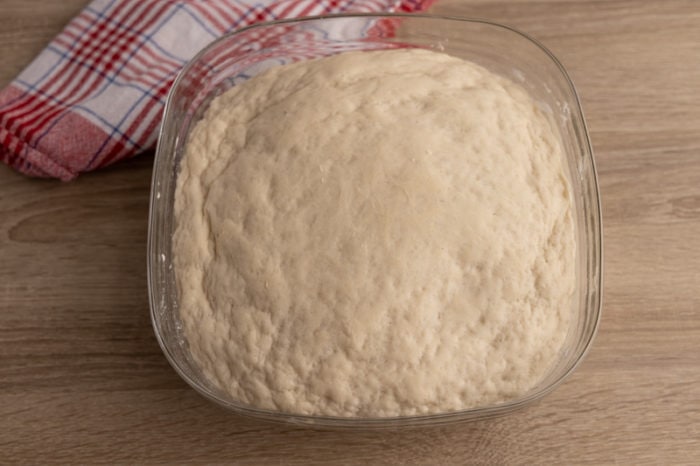
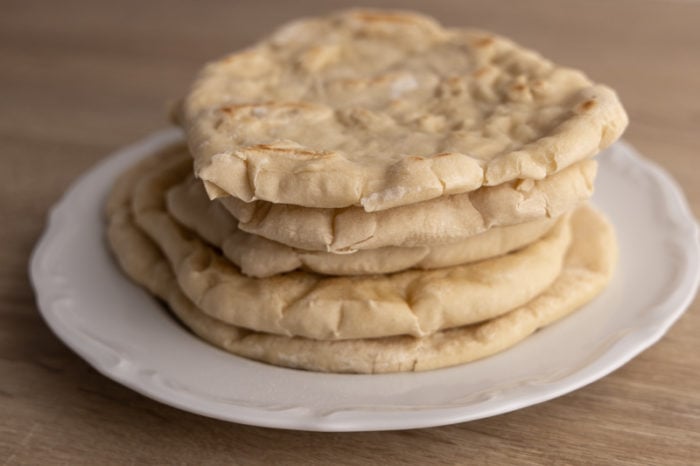
Clearly, the defrosted cake yeast works as a leavening agent just fine.
(I made pita flatbreads using the dough and even tested freezing pita bread with them.)
Now that you know that freezing fresh yeast is okay, let’s talk about the freezing process.
How to Freeze Fresh Yeast
Here’s how you freeze fresh yeast:
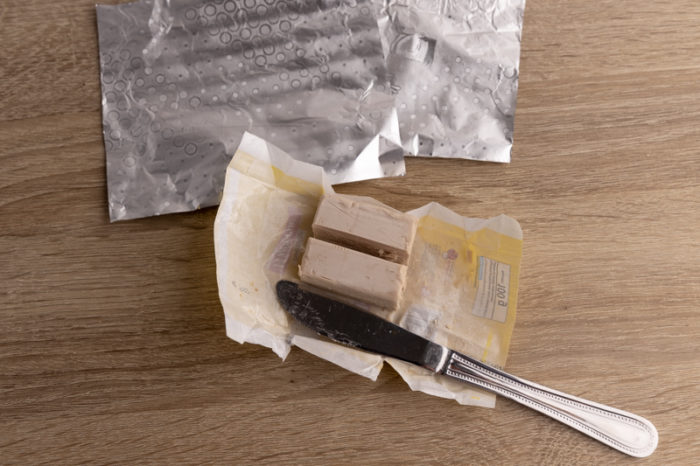
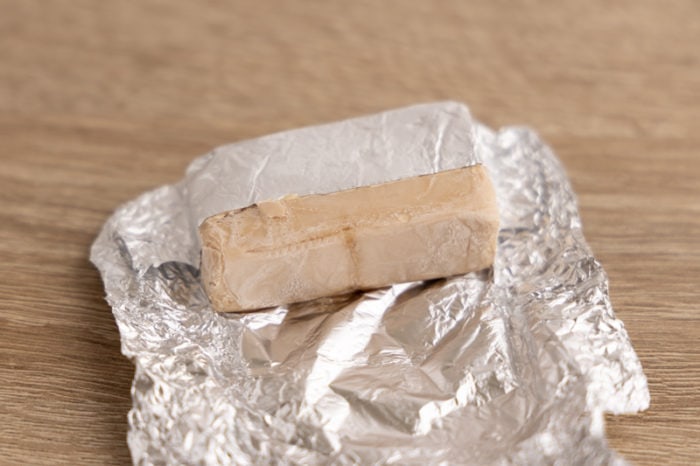
- Slice the leftover block into recipe-sized portions. It’s best to portion the yeast now because it’s quite difficult (but still doable) to cut it up when it’s frozen. Think about how much yeast you usually need, and cut up the block accordingly. When in doubt, it’s better to go with slightly larger blocks so that you keep your options open.
- Wrap each portion tightly with aluminum foil, plastic wrap, or freezer wrap. This one is crucial because the foil or wrap keeps the yeast from drying out. I usually opt for aluminum foil, but use what you have.
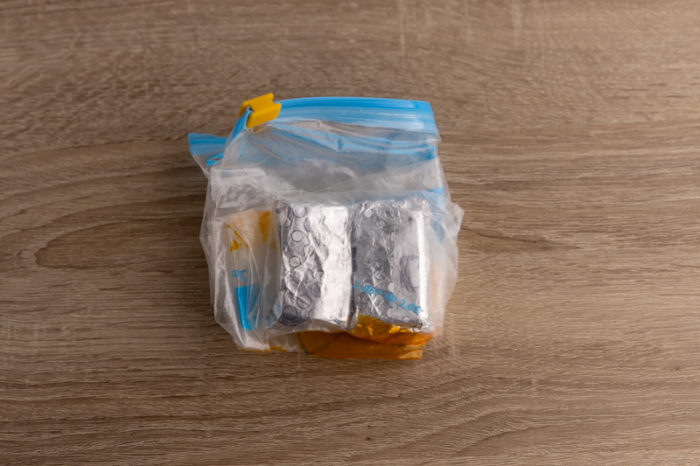
- Transfer the portions into a freezer bag or airtight container. This step has two purposes. First, it gives the yeast an additional layer of protection against cold air. Second, it helps you keep things organized. Add a label with the name and date if you find that helpful.
- Freeze.
That’s it. The whole procedure shouldn’t take you more than a couple of minutes.
There’s a bit of playing with foil that I don’t like that much, but that’s the price you pay to keep the yeast fresh and moist.
If you can’t be bothered with portioning the fresh yeast, you can freeze the whole block (leave it wrapped) in a freezer bag. Cutting off a slice from a frozen block is tricky but still doable with a bit of patience.
How Long Will Fresh Yeast Last in the Freezer?
Fresh yeast retains potency for at least 3 to 4 months in the freezer. I used cake yeast that sat frozen for more than five months, and it still worked perfectly fine.
As usual, the longer the yeast sits in the freezer, the worse its quality will be after defrosting. But the quality loss process is slow, and there isn’t much difference between yeast frozen for a month and three months.
That said, I suggest you keep the yeast in a spot where you see it often and use it within three months. This way, you get the most out of it and don’t have to worry much about whether or not your dough will rise.
If you’re worried if your defrosted cake yeast is still potent, you can proof it. I describe the process in the section on using defrosted yeast.
How To Defrost Fresh Yeast
Defrost your fresh yeast unwrapped and in a bowl that you will use to make the cake dough. Cover the bowl while you’re defrosting the yeast.
Fresh yeast softens when it’s defrosted. Sometimes it even becomes gooey or straight-up liquid. That makes removing it from any foil or wrap a pain.
The foil rips easily (not the case for the heavy-duty variety or plastic wrap), plus the defrosted yeast sticks to the wrap.
By unwrapping the frozen block, you avoid most of those issues (the foil still rips, but things are much easier when the yeast is solid).
By placing the yeast portion in a bowl that you’re going to use it in, you avoid having to transfer soft and sticky yeast from one place to another. It’s already where it should be when it’s defrosted.
Now, you have a couple of options for defrosting:
- Leave the bowl in the fridge for 4 – 8 hours, or overnight, in the refrigerator. That’s a slow way to defrost the yeast.
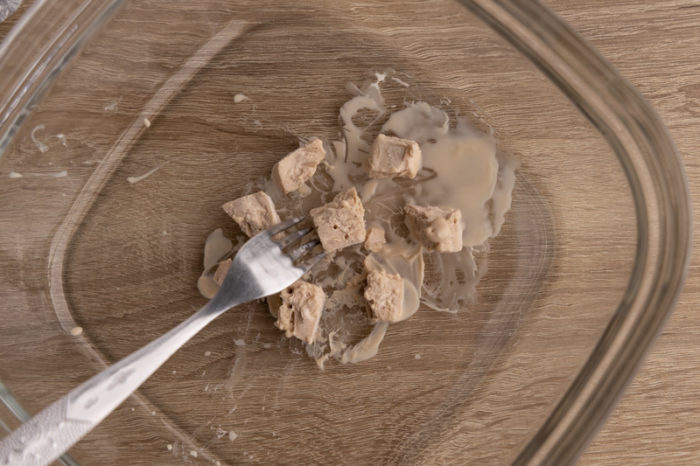
- Crumble the yeast in the bowl, and thaw in the fridge for 1 to 1.5 hours. Crumbling frozen yeast isn’t easy (it’s quite firm), but you can do this (see my photo). And this helps speed up the defrosting time immensely. If you can’t crumble yours, leave it in a bowl on the countner for 10 minutes, and try again.
- Crumble the yeast in the bowl, and leave it on the counter for 30 – 40 minutes. If you’re in a hurry, that’s your best option. Make sure to use the yeast immediately after it’s defrosted.
Your goal in defrosting cake yeast is to get it to a point where it’s soft, and you can easily mix it with flour and the rest of your ingredients. Once you can mash it with a fork, it’s good to go.
Last, the degree to which cake yeast softens after defrosting varies. Most of the time, it’s soft and moldable, but sometimes you might end up with gooey or even liquid cake yeast.
Here’s what I mean by liquid:
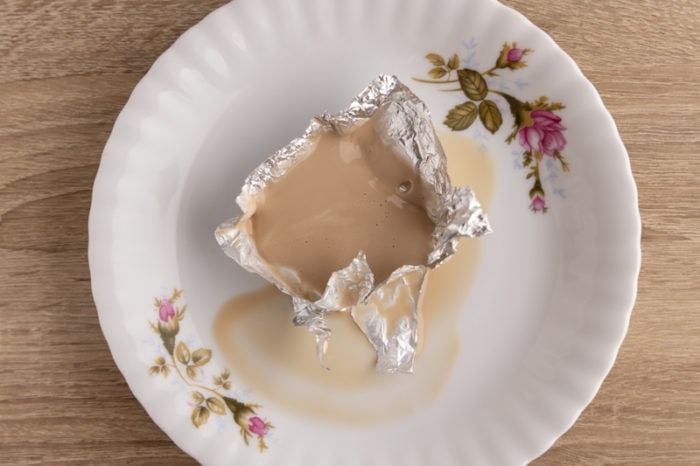
It looks pretty disgusting, but the yeast still works okay. I understand if you throw it out if it looks this way, but you don’t have to.
My wife made pizza batter with that liquid, and it worked out pretty well (see pizza photos in the article). The dough didn’t rise exactly as well as it usually does, but the difference wasn’t that big.
Since ending up with “liquid yeast” is an option (I couldn’t pinpoint why things went down this way), I strongly suggest using a bowl when defrosting cake yeast.
Using Defrosted Fresh Yeast
Now, you have your fresh yeast defrosted, but you’re a bit nervous about using it. Maybe the portion seems a tad bit dry on one side or too soft for your liking. What if the dough doesn’t rise?
Fortunately, there’s an easy way to check if thawed fresh yeast is still potent – you can proof it.
The process is simple and allows you to make 100% sure your yeast works before mixing it with the rest of your ingredients.

Proofing Fresh Yeast
Here’s how you proof fresh yeast:
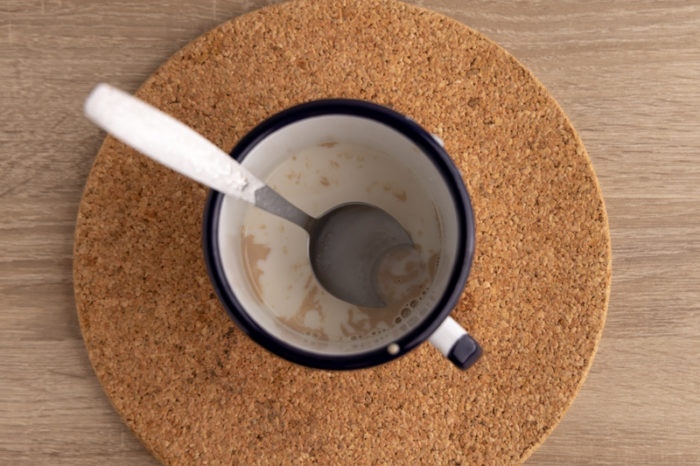
- Dissolve 1 teaspoon of sugar in half a cup of lukewarm (90°F – 95°F or 32°C – 35°C) liquid. Use the liquid your recipe calls for, which is usually water or milk. And use a much bigger bowl to account for the foaming and expansion of the liquid. Also, make sure the temperature isn’t above 120°F (or 49°C), because that temperature is too hot for yeast to survive.
- Crumble the yeast into the liquid and stir until it’s dissolved.
- Leave the mixture on the counter for 5 to 10 minutes. If it foams vigorously and the liquid expands, it’s definitely good enough to use. If there’s only a bit of foam or none at all, the cake yeast is useless.
Once that’s done, you can continue with your recipe. Remember to subtract the amount of liquid and sugar from the recipe’s totals to account for what you’ve already used.
Yeast Proofing Built-in a Recipe
Some recipes have a separate proofing step built in them. It’s usually similar to the above in that it asks you to mix some liquid, sugar or flour (or both), and yeast.
Once everything is incorporated, you let the mixture sit on the counter for 5 to 10 minutes until it rises and foams.
This way of proofing yeast is as good as the previous one, as it doesn’t use all of the ingredients, and you’re not going all-in with the fungi.
Other recipes skip the proofing step and ask you to mix all the ingredients right away into a big ball of dough, and let that ball rest for an hour or so so that it can rise.
If you’re sure your defrosted yeast is just fine (and it should be, if you’re following my instructions), it’s perfectly fine not to proof the yeast before going all-in with it. But if you’re unsure, it’s always better to proof the yeast using the instructions from the previous section.
Your Turn
Now that you know how to proof defrosted yeast and when doing so makes sense, you’re ready to use the yeast. Feel free to use it in any recipe you like, including:
- cakes
- baked goods such as cinnamon rolls and tons of others
- bread, hamburger buns, hot dog buns, and the like
- pancakes
- flatbreads like pizza dough, pita bread, naan bread, and the like
What’s interesting is that most of the dishes above also freeze quite well.
If you’re not super experienced with baking with yeast and want to learn a thing or two, check out this guide to baking with yeast. You’ll surely get a lot from it.
Happy baking!